

This weekend, a group of friends and I loaded and fired the wood kiln at
Cedar Creek. For past firings, we've fired to ~
cone 9 (^9, ~2300°F). This time, we decided for several reasons to fire to ^6 (~2240°F). First, wood firing is strenuous work: we stoke the kiln and stir the coals pretty steadily for several hours. Past firings have generally taken 12-17 hours, with the kiln typically stalling out around ^7 or 8. We figured it should be relatively easy and significantly faster to make it to ^6. Second, the lower we fire, the less fuel we use. Burning old pine pallets is one way to recycle, but it isn't exactly environmentally friendly. We hoped that skipping the long stall before ^9 would make a positive dent in the total amount of wood needed. Finally, this past year,
Claymakers shifted their
reduction firing option from ^9 to ^6. Thus many of the folks in our wood firing group were already using ^6 clay bodies and had easy access to reliable ^6 reduction glazes.
Wood firing is thrilling, but it brings out assorted anxieties in me because, well, I'm generally an anxious person.
Pre-firing organizational anxiety. Is everyone making pots? Will we have too few pots to fill the kiln? Too many pots? Too few? Too many? Waffle waffle, nudge nudge.
Glazing anxiety. So much blank bisqueware, so many decorative decisions. I thank my glazing support group, Rob & Di, for putting up with my anxious chatter during our glazing fest on Friday.
Packing anxiety. All participants are gathered around the kiln, with all pots wadded: do we have too many pots? Too few? Too many short pots, not enough tall? Too many wide pots, not enough narrow? How will we get all those pots into the kiln?
Despite the anxieties, there are few projects I enjoy more than wood firing. We wadded pots Saturday morning (thanks, Charlie, Blanka, Jo, Jessie, & Bob, for the extra wadding help!), and started loading around noon. There's something pleasurably artful about packing a kiln efficiently, fitting all the puzzle pieces together neatly. That pleasure, combined with a dose of packing anxiety, leads to a tendency to pack the back of the kiln tightly (when we're concerned about fitting everything in efficiently) and to pack the front loosely (when we start running out of pots because we packed the back so beautifully). I think we found a good balance this time.

Despite early projections, it turned out we had room to spare. We were short on tall pots, so we had to leave some gaps toward the top of the kiln. Still, it was the most elegantly loaded kiln I've ever had the pleasure of sharing, with a lovely assortment of pots. Two wadding kiln gods went into the kiln for good luck (thanks, Charlie & Di!). Serene Wadding Buddha and Chipper Dog remind me to chill.
We fired on Sunday. Rob and Blanka started the kiln at 7am. By 1pm, we still had some 1200 degrees left to go. Stoke, stir, stoke, stir. A smaller amount of clay requires less time to heat than a larger amount of clay, and we had twice as many pots on the bottom of the kiln as on the top, so we had a hard time heating the bottom of the kiln. The back stack also heated more slowly than the front. Consequently, as the pyrometric cones at the front middle and top of the kiln started arriving at ^6 and ^7, the ^5 cones at the bottom and back of the kiln remained stalwartly upright.
Had we been firing to ^9, we could have plowed right through that unevenness. Instead, just as we would have with a ^9 firing, we spent the final couple of firing hours trying to even out the temperature throughout the kiln, attempting to hold the top of the kiln at ^6 while heating the bottom and back. Thus
Zeno's dichotomy paradox applies during firings! (If Zeno wants to buy a peach, he knows that he can't just walk to the farmer's market: he needs to walk a block further than the farmer's market and stop at the peach stand
en route. Silly us, we though we could get away with just walking to the farmer's market.)
Eventually, we got the cool parts of the kiln up to a passable ^5-^6, with the middle and top of the kiln at ^7, and we sprayed in the soda ash. Because
soda acts as a flux, it makes the pyrometric cones melt more; by the time we were done spraying (~8pm), all of the ^7 cones were totally obliterated.
The last anxiety mode is until-we-unload anxiety, which I didn't realize was on my list until I started dreaming last night:
Some of us (I'm not sure who) sneak over to Cedar Creek to open the kiln--too soon, too soon!--in the pale pink-blue-gold-gray light of early dawn. Other faceless people--strangers--are present on the roof, but we don't want them to see us because we're not really supposed to be there before the gallery opens (liability concerns), plus they'll see us opening the kiln too soon. They don't appear interested in us, however, because they are busy watching the festive fireworks going off over the distant horizon. In a rustic barn, where we bring the surreptitiously unloaded pots (we know we may look at the pots in the kiln, but we aren't supposed to move them until the whole group is gathered on Thursday; but it's always so hard to resist!), we see that everything is underfired; somehow, even the pots that are overfired are underfired. The sand-papery glazed surfaces have rectangular bits of some unmelted glaze chemical all over them. I forget to check how the slipped surfaces have fared because I am so distracted by the glaze defects. Apparently we also forgot to empty some of the pots when we put in the liner glazes: some of the cups are 3/4 full of unmelted glaze. We can tell, looking down at the pots from our vantage point near the kiln roof (we don't want to climb all the way up onto the roof, lest the fireworks-gazers get suspicious), that the whole load is like that, but because of the cups full of glaze, refiring isn't an option, even though we know no one else will be using the kiln this coming weekend. I am foggily aware that there are a logical inconsistencies in all of this, which causes me to wake up.
I might just have to go pull a peep brick on Tuesday to make sure everything looks OK. We unload the kiln on Thursday.


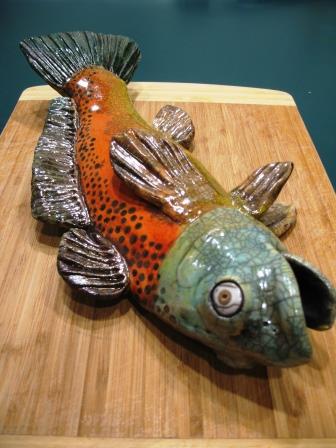

 The Moebius Diatom Boxes experienced minimal warpage, and none of the parts stuck together. The photos make them look toastier and bagelier than they are in reality. I expect future MDBs will end up electric or gas fired, maybe with some stains for color, to reduce preparatory exasperation.
 My four favorite pieces are square boxes (wheel thrown and altered!) that I glazed top to bottom. They responded beautifully to the soda. The tallest box is about 5" high.


 I will concede that the bubbly crusty purple stuff looks pretty good on chickens. Here's a close up of the crusty stuff on some cups, where it's less appealing (dry crusty stuff and lips don't go well together):
 Upon pieces that are strictly objets d'art, the purple stuff is fine. The objet on the left is actually a vase form on its side, though I very much like the spherical look in the photo. I was planning to give up holes for a while, but I think I'm going to have to try making some hole-filled spheres.
 On the Double Torus-Multiple Size Hole/Total Coverage Klein Bottle that's been patiently waiting to be fired since last summer, the purple is a little garish against the green glaze. What am I saying, the [w]hole thing is garish anyway:


 Also in the category of Pots-That-Have-Been-Waiting-Since-Last-Summer are several wheel thrown and altered oval boxes. Alas, instead of using my purple alumina hydrate wax on the lids, I wadded the lids--with the somewhat predictable result that most of the lids warped. Dang. From here on out, it's alumina hydrate wax for me.


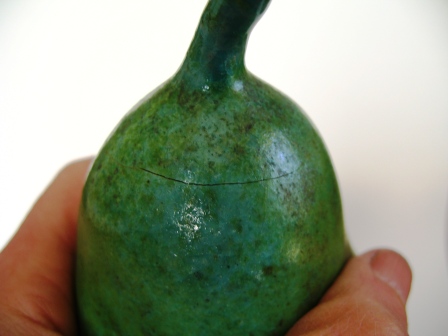
 To end on a more positive note, here are some non-crusty, lid-fitting oval jars (does that count as litotes?), and a picture of a flattery* penguin chatting it up with a chicken at an office party (penguin and penguin photo by Bob F.).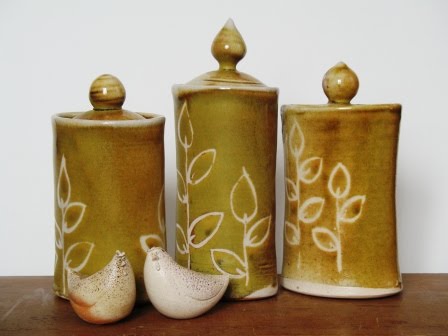

 We unloaded the kiln today. Serene Wadding Buddha got a hefty dusting of black soot plus some disturbingly green mystery powder, yet still he sits contentedly on his mat with his wee bird companion and cup of tea (which is not 3/4 full of unmelted glaze). Nothing fazes him.
 What's that, you say? It looks like something is amiss with the far end of the bag wall*? Why, you're right! It collapsed during the firing. Fortunately, it slumped sideways into the kiln wall rather than tumbling onto the loaded shelves. Casualties included just two bowls, a cup, and a chicken, none of which fell from the wall. Thanks, Serene Wadding Buddha (and to you too, Chipper Dog, of whom I have no post-firing photo)!


 This weekend, a group of friends and I loaded and fired the wood kiln at Cedar Creek. For past firings, we've fired to ~cone 9 (^9, ~2300°F). This time, we decided for several reasons to fire to ^6 (~2240°F). First, wood firing is strenuous work: we stoke the kiln and stir the coals pretty steadily for several hours. Past firings have generally taken 12-17 hours, with the kiln typically stalling out around ^7 or 8. We figured it should be relatively easy and significantly faster to make it to ^6. Second, the lower we fire, the less fuel we use. Burning old pine pallets is one way to recycle, but it isn't exactly environmentally friendly. We hoped that skipping the long stall before ^9 would make a positive dent in the total amount of wood needed. Finally, this past year, Claymakers shifted their reduction firing option from ^9 to ^6. Thus many of the folks in our wood firing group were already using ^6 clay bodies and had easy access to reliable ^6 reduction glazes.
 Despite early projections, it turned out we had room to spare. We were short on tall pots, so we had to leave some gaps toward the top of the kiln. Still, it was the most elegantly loaded kiln I've ever had the pleasure of sharing, with a lovely assortment of pots. Two wadding kiln gods went into the kiln for good luck (thanks, Charlie & Di!). Serene Wadding Buddha and Chipper Dog remind me to chill.
